How to Install a Walk-In Cooler or Freezer: Installation Guide

how to install a walk-in cooler

Installing a walk-in cooler or freezer is more than assembling insulated panels. A successful installation starts long before the first panel is set in place. Proper planning, site preparation and attention to detail help ensure the walk-in performance is as designed while reducing delays, rework and unnecessary costs. 


Whether you’re installing a walk-in for a grocery storefood service operationoutdoor cold storage application or equipment enclosure, following the proper installation sequence is essential. While every project has unique requirements, these best practices provide a strong foundation for successful installation. Always refer to the project specific drawings and installation instructions provided with your order.

Before You Begin: Prepare for Installation

Preparation is one of the most important parts of any walk-in installation. Before construction begins, take time to verify that everything is ready. 

Start by taking inventory of the shipment. Confirm that all materials have been delivered and compare the shipment against the packing list. Missing items must be reported within 48 hours of delivery to help minimize project delays. 


Next, verify that every panel and component belongs to the correct project. Before installation begins, coordinate with the general contractor to ensure everyone is working from the latest approved drawings. Taking a few minutes to verify dimensions, layout and project details can prevent costly mistakes and unnecessary rework. 


Finally, confirm the installation location. A simple rule applies here: check twice, build once. Panels should also be stored properly before installation. Although KPS Global panels arrive wrapped for protection during shipping, the packaging is not waterproof. Panels should always be stored in a clean, dry location until they are ready to be installed.

Prepare the Installation Site

A properly prepared jobsite helps prevent many of the most common installation issues. 

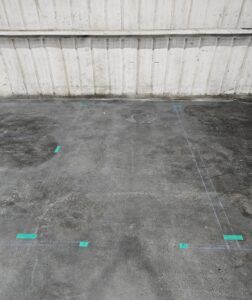
Begin by chalking the layout of every walk-in on the floor, even if the project includes only a single box. This allows installers to verify dimensions, identify potential obstructions and confirm that the walk-in will fit exactly where intended before construction begins. 


Don’t forget to look up. Verify there is sufficient overhead clearance for the full height of the enclosure before installing any wall panels. Discovering an obstruction after the walls are partially assembled can require significant teardown and rework. The floor should also be inspected before installation. 


For freezer applications, the walk-in must be installed on an insulated slab or insulated freezer floor to provide the required thermal break. KPS Global has experienced project managers that can provide guidance on concrete requirements to help ensure the site is properly prepared for a successful installation. 


Coolers can typically be installed directly on a level floor. During installation, focus on keeping the tops of the panels aligned rather than attempting to compensate for minor floor irregularities at the bottom. 


Before installation begins, installers should also verify the required floor fastening method, whether using screed, seismic angles or another approved anchoring system.

Build the Walk-In

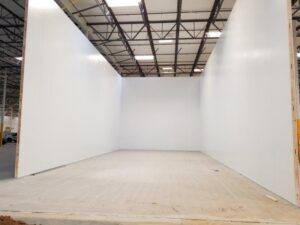
Once the site is prepared, construction can begin. Start by assembling one corner of the walk-in and continue building in a horseshoe pattern. Ceiling panels should be installed as wall sections are completed rather than waiting until all walls are standing. The ceiling helps stabilize the structure and maintain proper alignment throughout the installation process. 


As each panel is installed, verify that every cam-lock fully engages and rotates into position. Proper cam-lock engagement is essential for panel alignment, structural integrity and long-term performance. When installing ceiling panels, ensure they are securely lagged down and cam-locked into place according to the project drawings.

 

Seal the Walk-In Properly

Proper sealing is critical for long-term performance, especially in freezer applications. Freezers require butyl sealant at panel joints to prevent warm air infiltration. Unlike silicone, butyl remains tacky throughout its service life, allowing it to maintain an effective seal as the building experiences normal movement and temperature changes. 


Silicone serves a different purpose. It is commonly used to seal trim pieces, fill visible gaps and create a clean finished appearance after installation.

Expert Tip Image

Butyl sealant never fully cures. If cleanup is needed, WD-40 is one of the few products that effectively removes excess butyl.

Install the Door

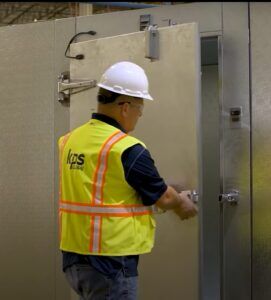
The walk-in door is typically installed after the enclosure has been assembled. If the project includes a ramp, it is generally installed at the same stage. While ramps are common for freezer applications, many cooler installations do not require one.
 

Complete the Final Installation Steps

As installation wraps up, complete the final finishing details before placing the walk-in into service.

This includes:

  • Installing trim pieces  
  • Plugging access holes  
  • Completing electrical connections  
  • Calibrating the thermometer  


To calibrate the thermometer, use an ice-water bath which provides a reference temperature of 32°F.

Common Installation Mistakes to Avoid

Many installation issues can be avoided with careful planning and attention to detail. 

Common mistakes include:

  • Failing to verify the latest project drawings  
  • Skipping shipment inventory  
  • Storing panels outdoors  
  • Forgetting to chalk the layout  
  • Not checking overhead clearance  
  • Misaligning panel tops  
  • Failing to fully engage cam-locks  
  • Omitting butyl sealant in freezer applications  
  • Installing panels with the interior and exterior sides reversed, which can require re-skinning  


Expert installation Tips

Successful installations begin long before the first panel is assembled. 

Planning ahead helps prevent most installation problems and keeps projects moving efficiently. 
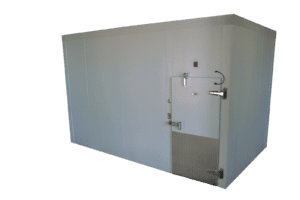
 

Small finishing details also have a big impact. Proper trim installation, clean silicone application and careful finishing work contribute to both the appearance and long-term performance of the walk-in. 


Finally, remember that every installation is unique. Outdoor walk-ins and specialty applications should always follow the project specific details and installation drawings provided for that project.
Summary

Installing a walk-in cooler or freezer starts with proper planning, site preparation and careful attention to detail. Verifying the project, preparing the installation site and following the correct installation sequence help ensure long-term performance while reducing delays and costly rework. By following best practices and the project-specific installation drawings, installers can complete a successful, high-quality installation. 


A properly installed walk-in cooler or freezer delivers years of reliable performance. Taking the time to verify the project, prepare the site and follow the correct installation sequence helps reduce delays, avoid costly rework and ensure the enclosure performs as designed. If you have questions about your project, the KPS Global team is here to help.

Frequently Asked Questions

Frequently Asked Questions

Installation times depend on the size and complexity of the project, ranging from as little as one day to approximately two weeks. Larger industrial projects may require additional time due to their size, height and overall complexity. 

Most crews consist of approximately four to six people. Larger projects often use multiple crews while keeping the same lead installer to help the project’s general contractor have a point of contact.

Properly engaged cam locks help align the panels, create a secure connection and maintain the structural integrity of the walk-in. Failing to fully engage the cam locks can lead to misalignment, air leaks and reduced long-term performance. 

All walk-ins use sealant. However, the type of application varies. Freezers use a butyl sealant at every joint. Both coolers and freezers use silicone for finishing and sealing gaps where needed. 

Walk-ins up to about 8ft can be installed using a ladder. Once passed the height, a scissor lift and forklift are typically required.

Complete the form and tell us what we can help you with.

Monday – Friday:

8:00am – 5:00pm Central

Subscribe to Stay Informed